Hello 😎 folks, this article is about how to add authentication in apps using AWS Amplify? This article is part of AWS Amplify Hackathon. It is very easy to managed service for authentication on web and mobile apps. But it's little bit trickier to implement for beginners in AWS cloud.
Amplify also supports login with a social provider such as Facebook, Google Sign-In, multi-factor authentication or Login With Amazon and provides fine grained access control to mobile and web applications.
Here i have made a simple react app that uses Amplify as authentication provider. Where it provides signup, sign in & forgot password functionality. That satisfy basic authentication need for any web or mobile apps.
Create an AWS account for using Amplify here if you don’t have one. They provide free tier so we don't have to pay for it now.
To check out more details about Amplify in this documentation.
To check out Cognito service go here.
Login using credentials and go to the AWS dashboard where you can find various services provided by AWS. This is basically server-less app that uses amplify as auth service provider.
Checkout this repository for full source code of this tutorial here.
Clone this repository and install dependencies via npm install and start react app by running npm start command.
Basically we have sample app that contains login, signup and forgot password pages. Here we only focusing on implementation of Amplify in our app.
If you login and go to the dashboard of AWS, you can see page like this that contains all services like this.
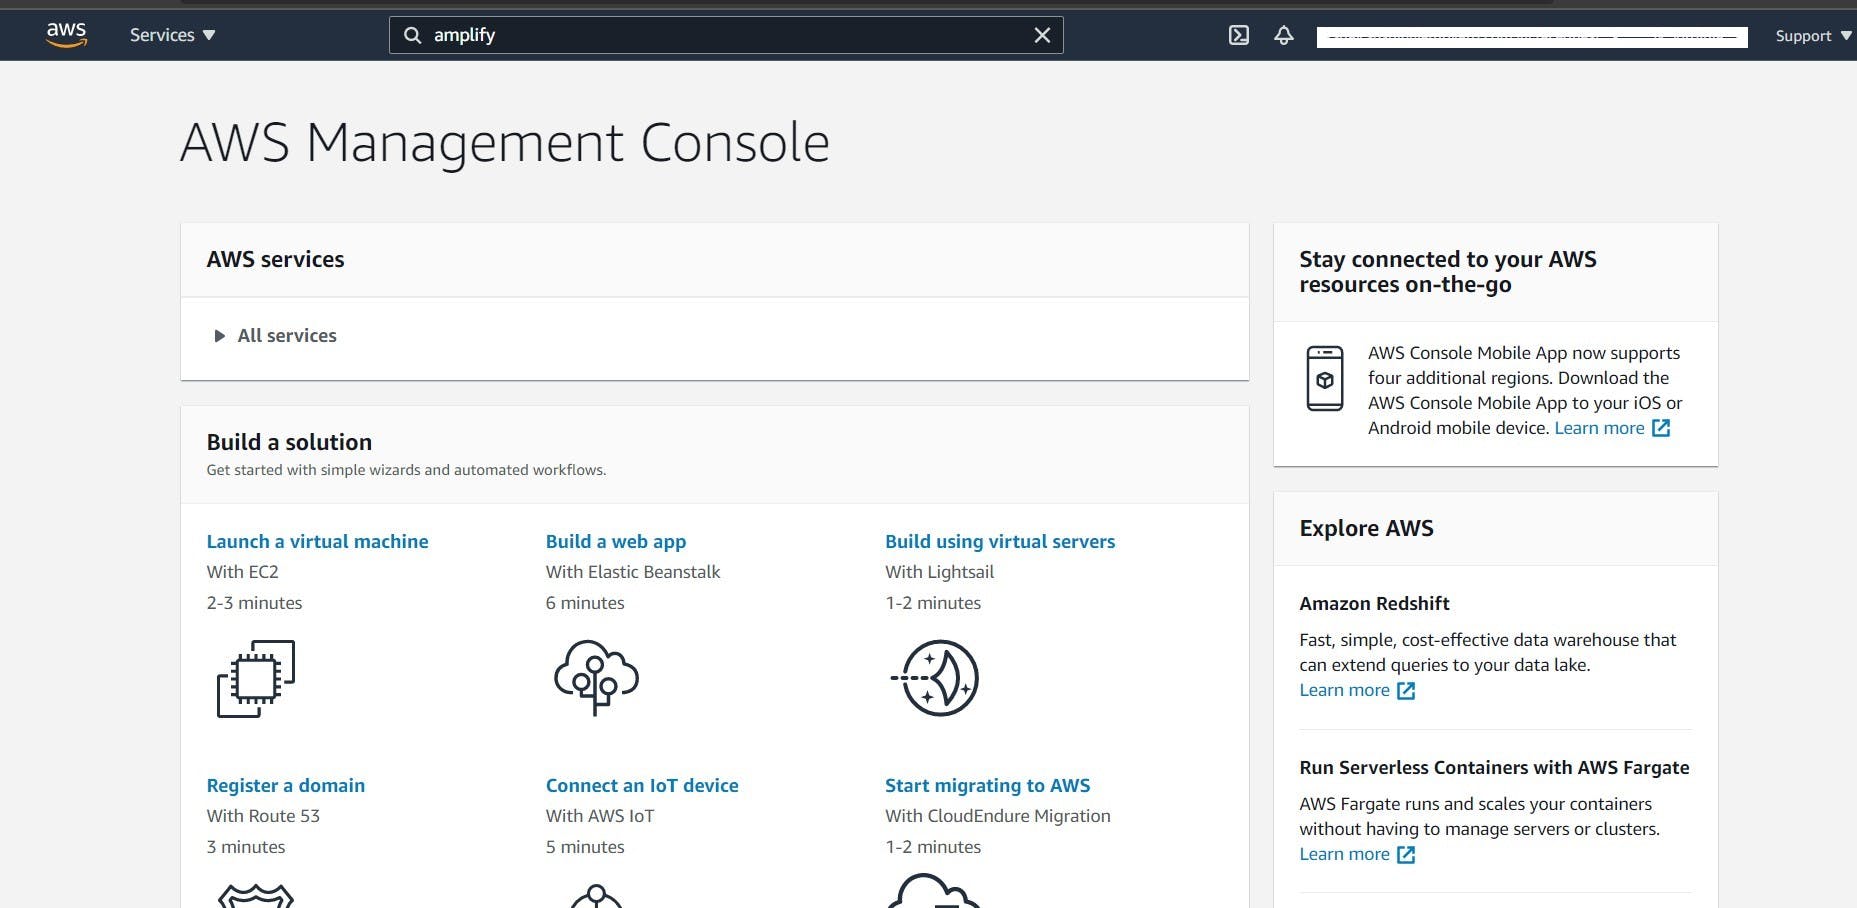
In search box up there type cognito and go there. You will see page like this.

Then go to Manage User Pool by clicking on it and go to create new user pool.
There it asks for enter user pool name, so enter any name of your choice.
Then go to Attributes section where it ask for different options like How do you want your end users to sign in? etc. Here we checked email as primary option.
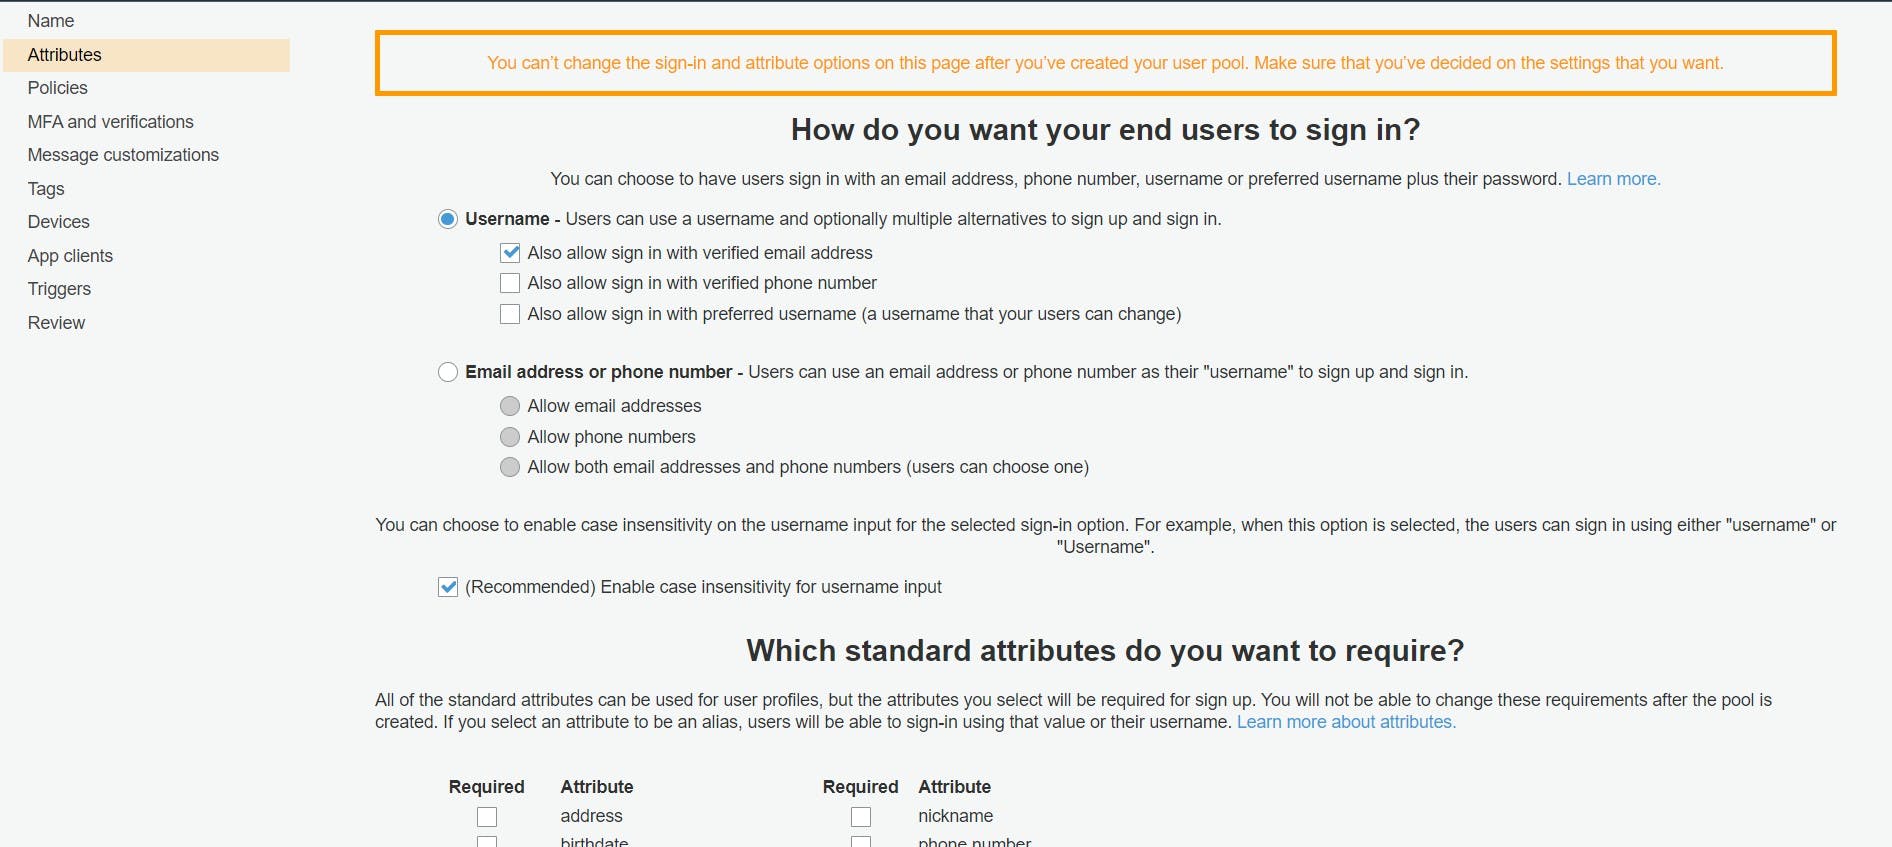
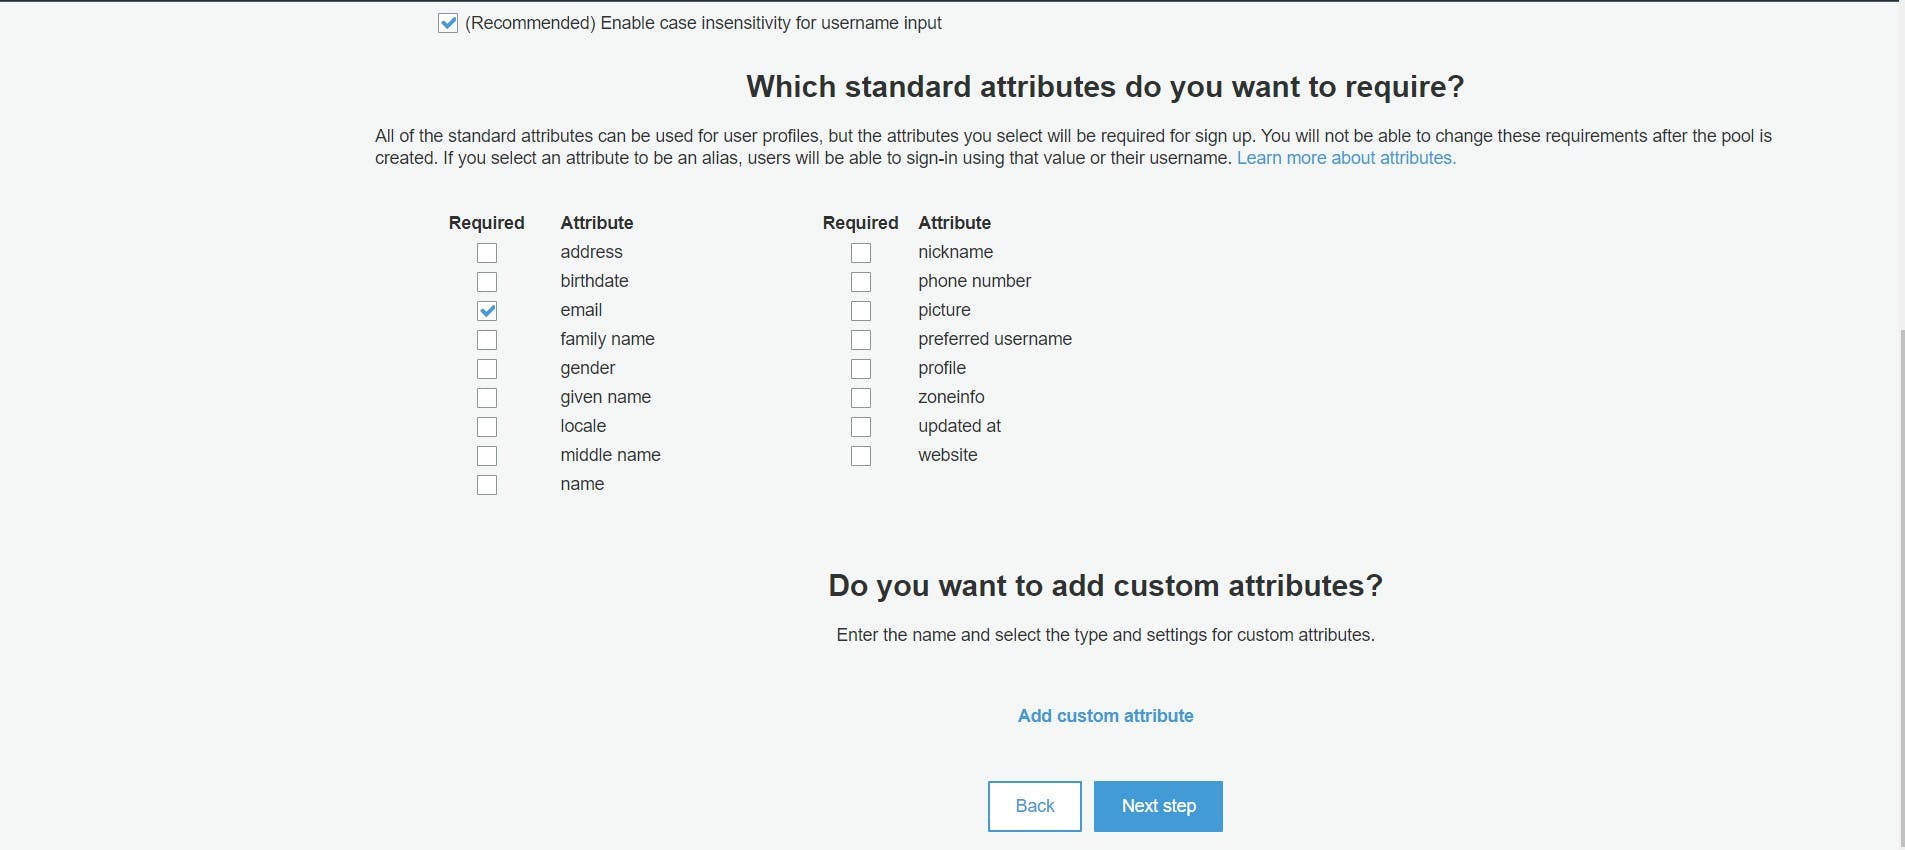
We use default configuration given by cognito and signin using email only and click on next step. It will take us to the policy page where we can set policy for our password like min length, require number, characters, symbols etc.
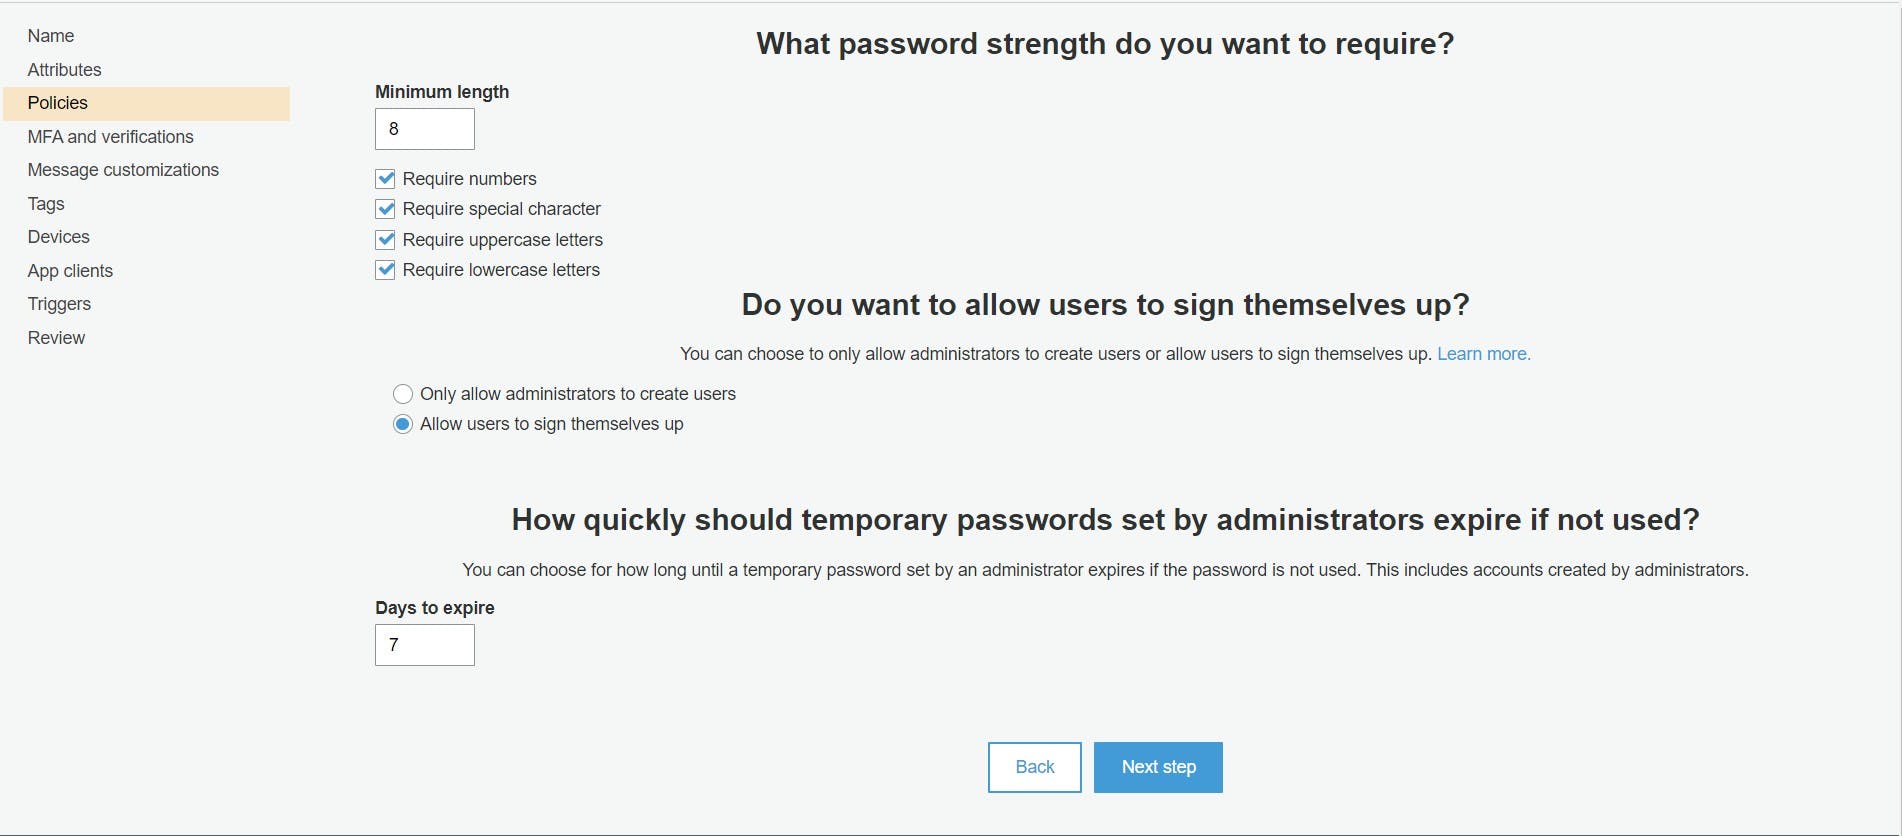
By clicking on next button we've go to MFA and verification page where we can enable Multi-Factor Authentication (MFA) by sending user a text message, but for the sake of simplicity we keep it default and click on next page.
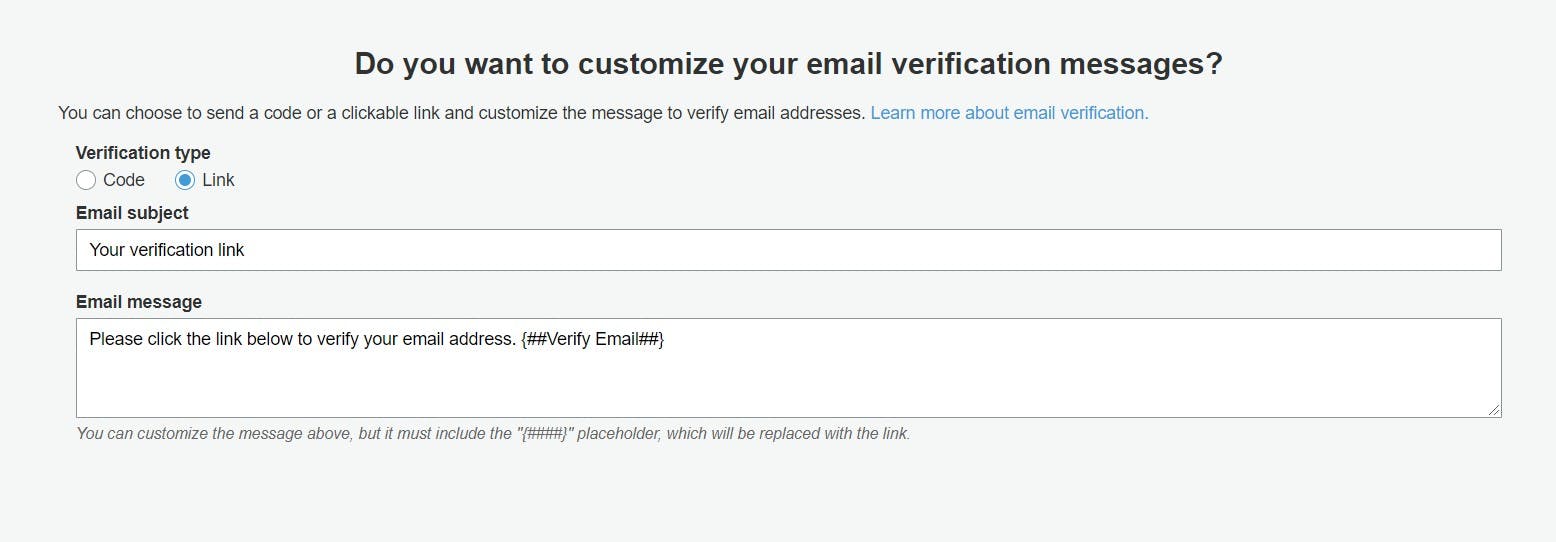
Now we are on Messages and customization page where we can setup how to verify user by sending email or verification code. Here we choose email and click on next page.
Here we skip Devices and Tags section it's more advanced topic. Then we go to App client. Here we select "Enable SRP (secure remote password) protocol based authentication (ALLOW_USER_SRP_AUTH)" by default it is selected and click on next step.
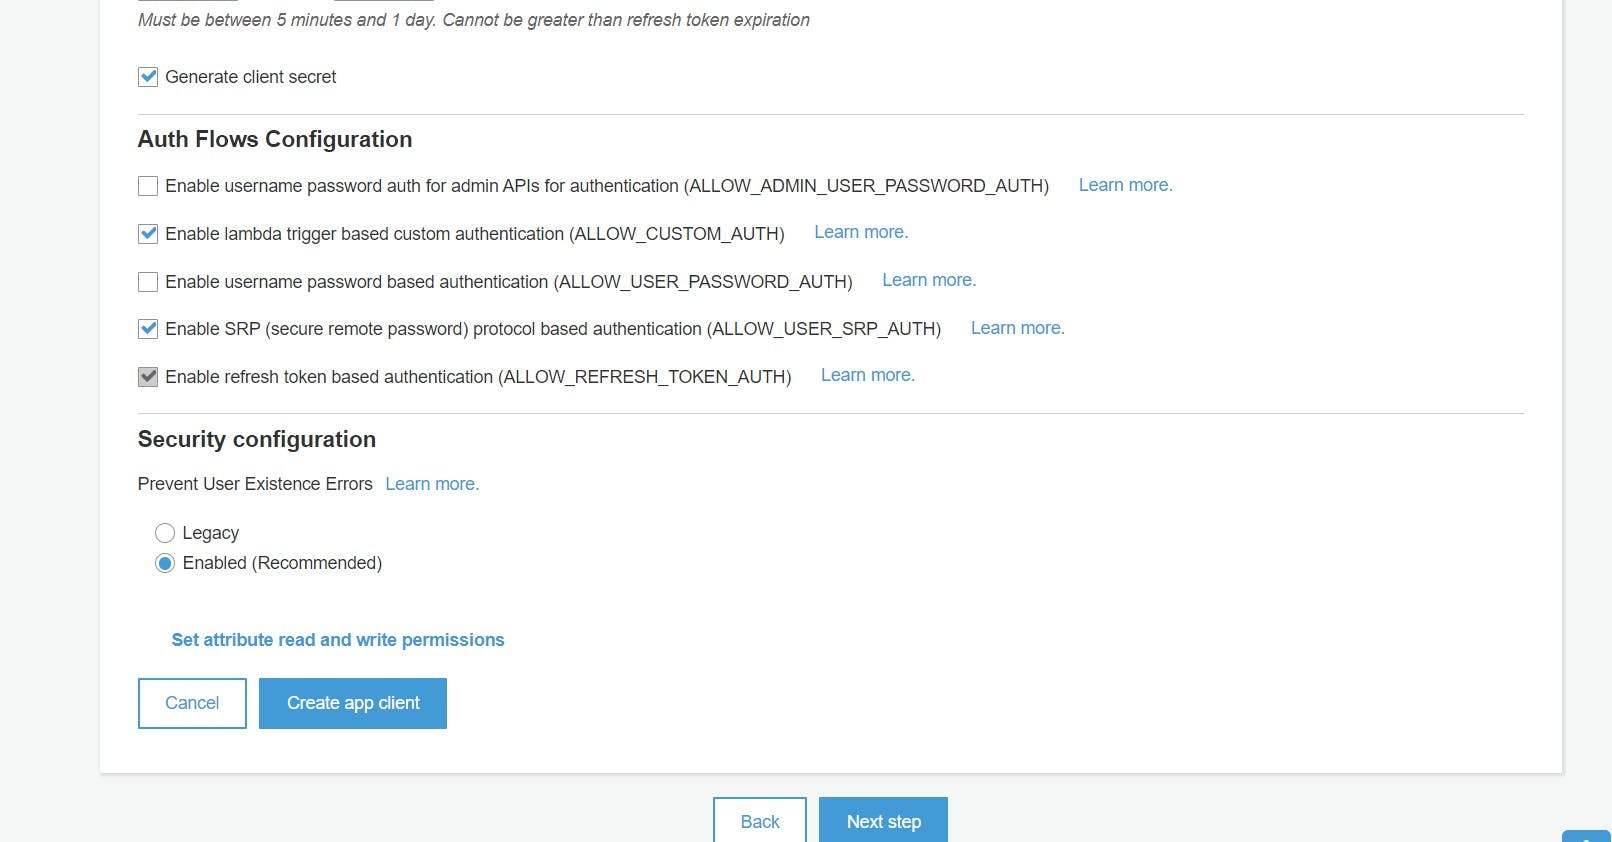
Skip the Triggers section and click next where we can review our user pool settings. If it is ask for enter pool name just enter again and click step through settings, go to review and click Create pool.
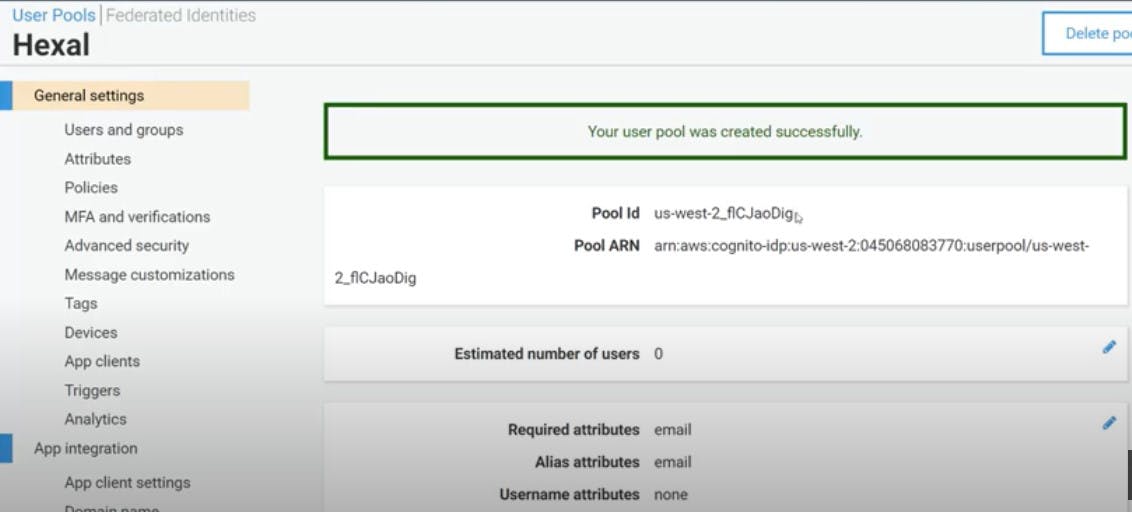
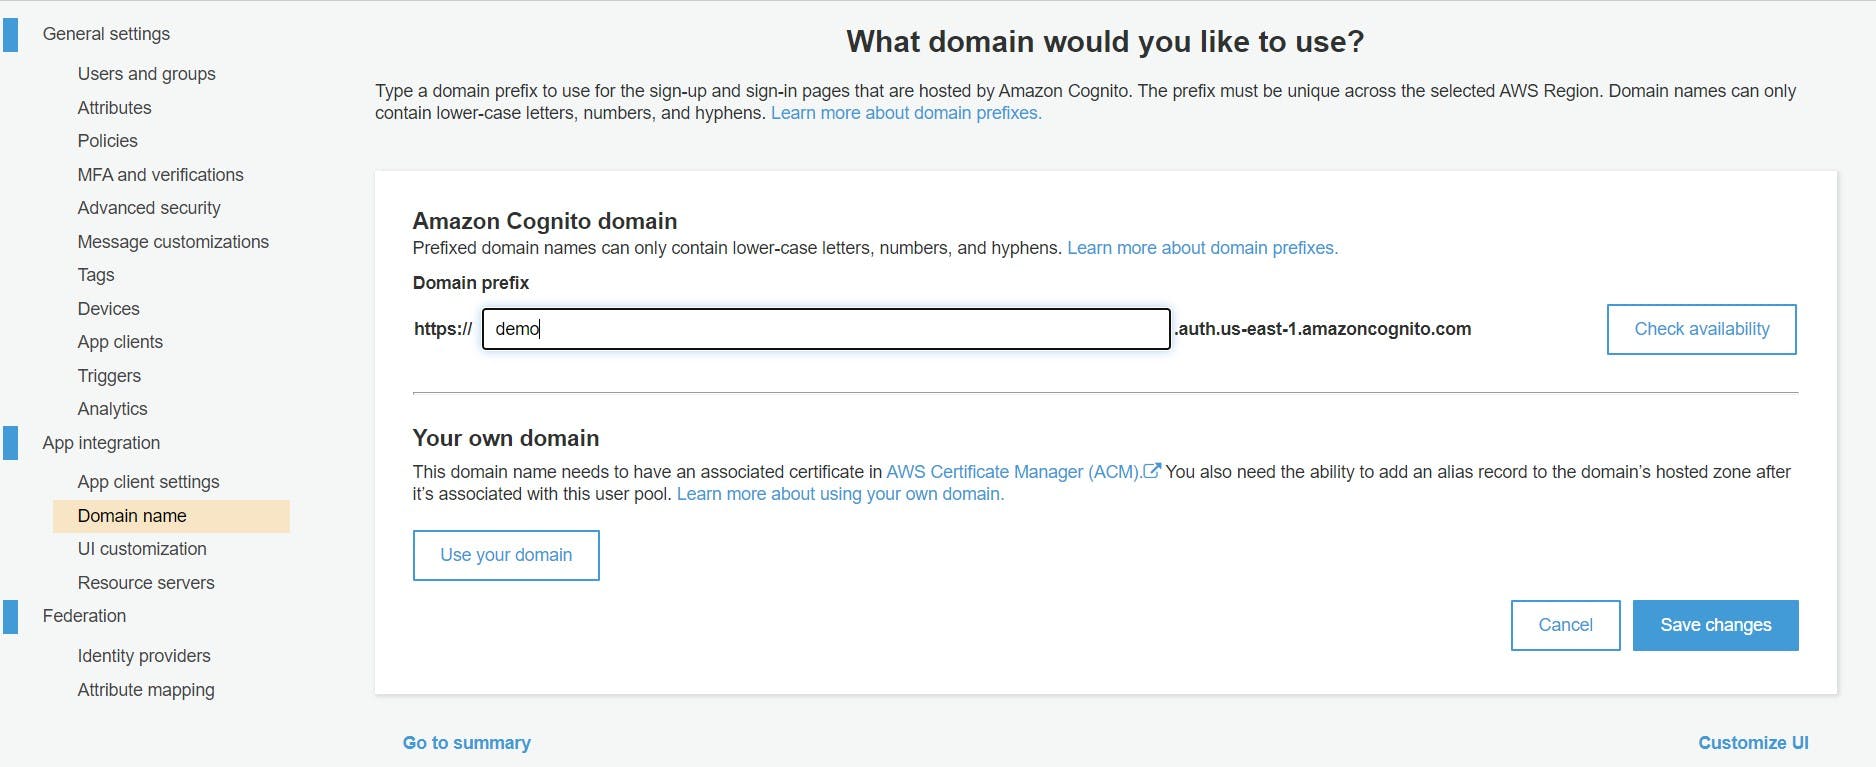
After create user pool go to domain section and create new domain and this is required to connect our app to the cognito user pool.
Now open your favorite code editor and go the src folder of this cloned repository.
Where you can find config.json file. In this file we can enter details like user pool id, region etc. Copy user pool id as shown in above image and go to App client and copy App client id from there.
{
  "api": {
    "invokeUrl": "https://5bltcq602h.execute-api.us-west-2.amazonaws.com/prod"
  },
  "cognito": {
    "REGION": "aws_region_for_ex. us-west-2",
    "USER_POOL_ID": "user_pool_id",
    "APP_CLIENT_ID": "app_client_id"
  }
}
Then we need to import amplify and config.json in index.js file.
import Amplify from 'aws-amplify'
import config from './config.json'

Amplify.configure({
    Auth: {
        mendatorySignId: true,
        region: config.cognito.REGION,
        userPoolId: config.cognito.USER_POOL_ID,
        userPoolWebClientId: config.cognito.APP_CLIENT_ID
    }
})
Here basic setup for amplify should be completed.
Implement Registration Service
First we have to implement registration service for our react app.
Go to ./src/components/auth/Register.js. In this Register.js file we have to add code for the register user. We already created form for the this with username, password, email & confirm password inputs.
First step is tom import Auth object from Amplify.
import {Auth} from 'aws-amplify'
Now go to the handleSubmit function where we have to add functionality for signup.
// AWS Cognito integration here
    const {username, email, password} = this.state
    try {
      const signupResponse = await Auth.signUp({
        username,
        password,
        attributes: {
          email: email
        }
      })
      console.log(signupResponse)
      this.props.history.push('/welcome')
    } catch (error) {
      let err = null
      !error.message ? err = {"message": error} : err = error;
      this.setState({
        errors: {
          ...this.state.errors,
          cognito: error
        }
      })
    }
Here we use try catch block for better error handling. First we have to extract username, email and password objects from state. Here we created variable called signupResponse that users Auth.signup() method where we have to pass username, password and attributes as email (Although it's optional).
If there is some error occurred during signup then we can handle it in catch block by setting error state object.
Now go to the register page and fill up the form with username, email, password and confirm password and submit the form.
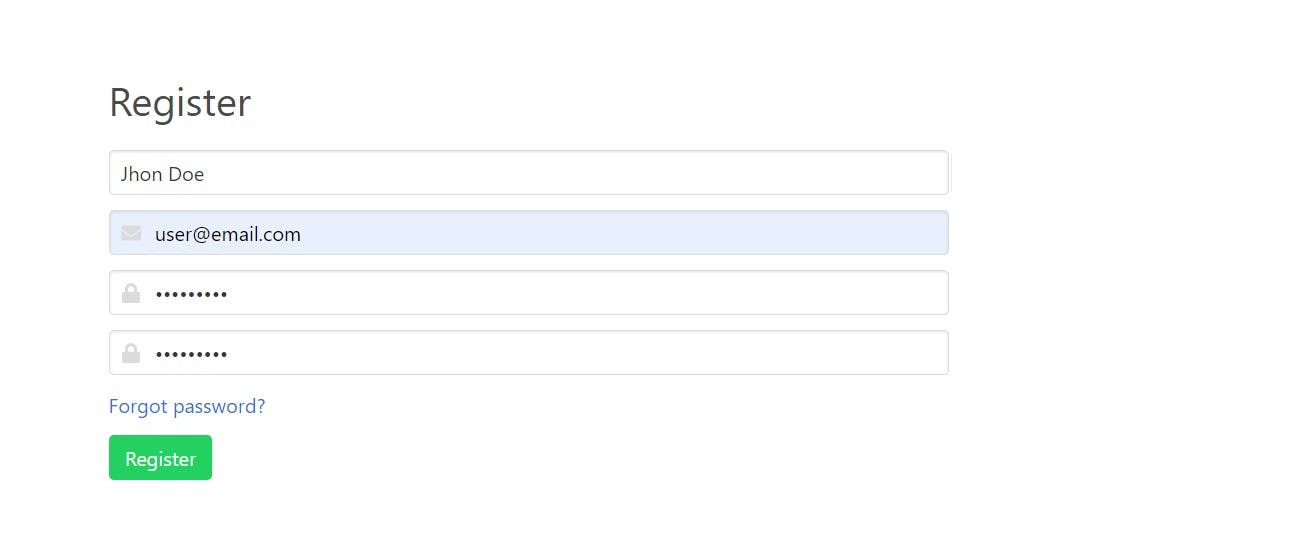
After successful attempt we redirect user to the welcome page by using this.props.history.push('/welcome')

Once you successfully register you can check user records in AWS cognito dashboard in users and groups section. You also see response in browser console.
After that user receives an email varification link. By clicking that link cogntio verify user email address. You can check Account status in user records and now it is set to confirmed.
User Login
In this part we implement login functionality for registered user. We use similar logic here that we used in Register.js file. First we need to import Auth from Amplify. Open Login.js file and in handleSubmit function add this logic.
import {Auth} from 'aws-amplify';
....

// AWS Cognito integration here
    try {
      const user = await Auth.signIn(this.state.username, this.state.password)
      console.log(user)
      this.props.auth.setAuthState(true)
      this.props.auth.setUser(user)
      this.props.history.push('/')
    } catch (error) {
      let err
      !error.message ? err = {"message": error} : err = error;
      this.setState({
        errors: {
          ...this.state.errors,
          cognito: error
        }
      })
    }
We get username and password and set it to the state. Create use variable and use Auth.signIn() method and pass username and password to it. After successful attempt we redirect user to the home page by setting up this.props.history.push('/'). Also we have to set authentication state to true if user is logged in and also set user.
After login amplify gives user object back similar like this.

We set user, isAuthenticating, isAuthenticated props in state. That goes into main file called App.js.
class App extends Component {
  state = {
    isAuthenticated: false,
    isAuthenticating: true,
    user: null,
  }

  setAuthState = authenticated => {
    this.setState({isAuthenticated: authenticated})
  }
  setUser = user => {
    this.setState({user: user})
  }

  async componentDidMount() {
    try {
      const session = await Auth.currentSession()
    this.setAuthState(true)
    console.log(session);
    const user = Auth.currentAuthenticatedUser()
    this.setUser(user)
    } catch (error) {
      console.error(error)
    }
    this.setState({isAuthenticating: false})
  }

  render() {
    const authProps = {
      isAuthenticated: this.state.isAuthenticated,
      user: this.state.user,
      setAuthState: this.setAuthState,
      setUser: this.setUser
    }
    return (
      !this.state.isAuthenticating &&
      <div className="App">
        <Router>
          <div>
            <Navbar auth={authProps} />
            <Switch>
              <Route exact path="/" render={(props) => <Home {...props} auth={authProps} />} />
              <Route exact path="/products" render={(props) => <Products {...props} auth={authProps} />} />
              <Route exact path="/admin" render={(props) => <ProductAdmin {...props} auth={authProps} />} />
              <Route exact path="/login" render={(props) => <LogIn {...props} auth={authProps} />} />
              <Route exact path="/register" render={(props) => <Register{...props} auth={authProps} />} />
              <Route exact path="/forgotpassword" render={(props) => <ForgotPassword {...props} auth={authProps} />} />
              <Route exact path="/forgotpasswordverification" render={(props) => <ForgotPasswordVerification {...props} auth={authProps} />} />
              <Route exact path="/changepassword" render={(props) => <ChangePassword {...props} auth={authProps} />} />
              <Route exact path="/changepasswordconfirmation" render={(props) => <ChangePasswordConfirm {...props} auth={authProps} />} />
              <Route exact path="/welcome" render={(props) => <Welcome {...props} auth={authProps} />} />
            </Switch>
            <Footer />
          </div>
        </Router>
      </div>
    );
  }
}

export default App;
Here we created authProps so that every route has access to the user and authentication properties. In Navbar we pass auth props so that we can show status of user on Navabar, if user logged in or not by passing authProps to it.
<Navbar auth={authProps} />
Render props in every route like this.
render={(props) => <Home {...props} auth={authProps} />}
Here we initialize all props by using spread operator {...props} in all components with authPorps.
Change User Password
If user want to change the password we can implement functionality for that. Go to the ChangePassword.js file in components/auth folder. In handleSubmit function we use Auth.changePassword() method and pass old and new password to it.
// AWS Cognito integration for change password
    try {
      const user = await Auth.currentAuthenticatedUser()
      console.log(user)
      await Auth.changePassword(
        user,
        this.state.oldpassword,
        this.state.newpassword
      )
      this.props.history.push('/changepasswordconfirmation')
    } catch (error) {
      console.error(error)
    }
Here user variable is initialized and set to the current authenticated user. In Auth.changePassword() method pass new and old password and current user. After successful attempt we redirect user to the /changepasswordconfirmation route where user can see message like this Your password has been successfully updated!.
Forgot Password
If user somehow forgot password then we are able to recover it or generate new password for the user by sending email address of registered user to cognito.
Go to the ForgotPassword.js file in auth folder where sample code is given with the form component to send email to the cognito.
Go to handleSubmit function and add following code under Auth cogntio integration here.
try {
      await Auth.forgotPassword(this.state.email)
      this.props.history.push('/forgotpasswordverification')
    } catch (error) {
      console.error(error)
    }
Here we just pass email id to the Auth.forgotPassword(this.state.email) method that handle all logic behind it and send an verification code via email to the user.
Now redirect user to the ForgotPasswordVerification page where user have to enter verification code sent by cognito, registerd email address and new password in given form.
Go to the ForgotPasswordVerification.js file and add code given below to it in handleSubmit function.
// AWS Cognito integration for forgot password
    try {
      await Auth.forgotPasswordSubmit(
        this.state.email,
        this.state.verificationcode,
        this.state.newpassword
      )
      this.props.history.push('/changepasswordconfirmation')
    } catch (error) {
      console.error(error)
    }
After successfully submitting form data we redirect user to the change password confirmation page.
this.props.history.push('/changepasswordconfirmation')
That's it we have implemented Authentication functionality to our React app using AWS Amplify. Checkout this repository for full source code of this tutorial here.
If you like this tutorial let me know in comment section below or follow me on Twitter.
